40 how to make clear labels with packing tape
How to Make Clear Stickers - DIY Transparent Labels 1- Print your image with a laser printer (Take into consideration the width of the tape). 2- Cover the image completely with clear packing tape (The heavier duty tape give much better results than thin tape). 3- Press down with the back of a spoon so that the tape adheres to the image. It will also eliminate bumps and bubbles. Can I put tape over a USPS shipping label? - Quora The common thing to do is to take the 2-inch wide clear Packaging tape and, using several pieces of tape, maybe coming out of a dispenser, put tape over the entire label. Sometimes you see advice that you not put tape over the barcode, but I have done it hundreds of times, for USPS and UPS, and it always wo Continue Reading Susan Beamon
Clear Labels - Blank or Custom Online Labels | Avery.com Get a no-label look with blank or custom clear labels. Order clear printable sheet labels or professionally printed clear labels on sheets or rolls in minutes. Whether you need transparent sticker printing for products and packaging, you want custom clear labels for wedding favors or party favors, or you want to do the clear sticker printing youself, there's an Avery label for every use.

How to make clear labels with packing tape
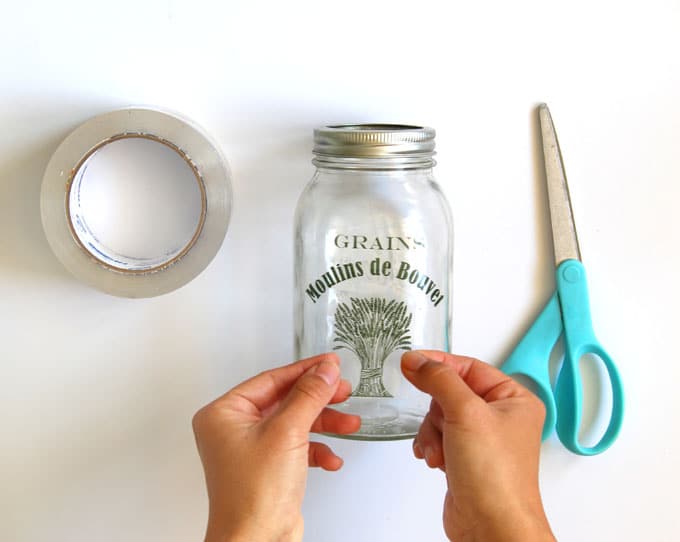
Packing Tape Image Transfers - Corel Discovery Center Packing Tape Image Transfers. Here is a quick and easy DIY project for creating clear stickers or labels, using your own images and some packing tape. The process is simple and you can decorate a wide variety of objects with your own custom stickers. Label storage jars for your kitchen, add designs to plain vases, votive candle holders or mugs ... Packing Tape Image Transfer & DIY Clear Labels - A Piece Of Rainbow Take into consideration the width of the tape, I will show you a trick at the end on how to make larger labels! Step 2: Pin it! Take a piece of tape, press the sticky side onto an image, center the packing tape over it evenly and press. Then cut out the section. Pin it! Tips for Applying Clear & Transparent Product Labels - StickerGiant Start by aligning your label on your product, and applying an edge of your label firmly to the surface. Then wrap your label around your product in a motion which moves with the natural curve of the surface. Working in a steady movement lets your labels adhere to your product surface smoothly, while preventing bubbles or wrinkles in the clear ...
How to make clear labels with packing tape. How to Create a Photo Transfer With Packaging Tape: 6 Steps 1 Place a strip of packaging tape across the part of the color copy that you would like to transfer. 2 Rub the tape down in both directions with the long edge of a ruler, eliminating bumps and bubbles. 3 Apply more tape where desired and repeat. 4 Soak the taped image in a bowl of warm water for at least five minutes. 5 DIY Hack to Make Labels with Packing Tape - Pinterest The Easiest Way to Make Clear Stickers - DIY Clear Labels for Jars. This image transfer teqhnique can be used for gift tags, used on fabric, for baskets, for bins, for plastic. Includes free printable sheet of pantry labels so you can use in your own home. We used a handwritten type font so the labels have a decorative flair! Packing Tape Image Transfer & DIY Clear Labels - Pinterest Make clear stickers using an easy packing tape image transfer method. Great for pantry labels, gift tags, custom designs on glass, wood or metal objects! Find this Pin and more on Crafts and More Crafts by JoAnne Apodaca. DIY Photo Candles with Packing Tape Clear Stickers Step 2: make clear stickers with packing tape. Apply a piece of tape to the image with the sticky side on the paper. If the image is bigger than the tape, you can use multiple pieces of tape. Just make sure to line up the seams as closely as you can. Now comes the most important part: burnish the printed images onto the packing tape. Use a spoon, place the taped image on a flat surface, and use a lot of pressure to burnish both sides of the tape and paper.
How to Make Labels with Clear Contact Paper - Forrester Home Cut to Correct Size. Cut your paper down to fit your surface. Then you'll cut 2 pieces of clear contact paper. The first one needs two be roughly 1″-2″ larger around the sides than the label. The second piece needs to be slightly smaller than your first leaving about 1/2″ smaller on the sides. See the image below if you're more of a ... Packing Tape Transfer: The Easiest Craft Ever! - DIY Candy Open a magazine and choose an image. Unroll a length of packing tape and place down on the page. Smooth down with a credit card (or similar burnishing tool). Cut the pages out from the magazine with the scissors. Soak the taped magazine pieces in the water for several minutes. The magazine will fall right off. Make Custom Clear Labels with Packing Tape - Lifehacker Make sure your printed label is not larger than your packing tape. Stick the tape on the label, and use the spoon to smoothen it. Cut it with the scissors, and soak it in the bowl of water for a... How to Make Clear Stickers - DIY Transparent Labels - YouTube Clear labels are quite pricy but it's possible to make your own at home using packing tape. It's a really cool, inexpensive and simple DIY image transfer tec...
DIY Clear Sticker Labels made with Packing Tape - Feeling Nifty Packing tape (the better quality ones work best) water credit card or spoon DIY Image transfer Techniques Tutorial Step 1 Print your label or design on a printer. Cut out your label Step 2 Take your packing tape, and tape the cutout label onto the sticky part of the packing tape Step 3 Cut off the packing tape/label from the tape roll Step 4 DIY Sticker Labels With Packing Tape Tutorial Printed sticker labels are pretty expensive but they do look aesthetic to use on your jars or storage. Now, you don't have to worry about how much sticker labels would cost you because this tutorial by Hometalk on YouTube will teach a DIY hack that only requires packing tape and ordinary printed texts. You can be creative and make other designs once you learned the basics. Clear Stickers : 6 Steps - Instructables Clear Stickers Step 1: Supplies + Tools. Step 2: Transfer Print to Tape. Stick the packing tape on top of the motiv. Use the spoon to rub the tape against the... Step 3: Cut. Roughly cut out your motive. Step 4: Soak. Put the cut out motive into the bowl of water and let it soak for some minutes. ... DIY Stickers: 3 Ways How to Make Homemade Stickers Step One: Cricut image design. If you don't have a sticker design, you'll have to create one. There are a lot of programs out there where you can make custom stickers. Sticker design is the best part of how to make homemade stickers. Some of those programs include Adobe, Gimp, Microsoft 3D, MS Paint, and Procreate.

Photos on Glass - This DIY is Easier Than You Might Think - The Crazy Craft Lady
How to Print Clear Labels with Your Laser Printer - ComboInk Blog What to do: First print your label in the color, font and size required. The label should be only as wide as the width of the packing tape you have. Fix the packing tape over the label's printed area. Pat down and smooth the two surfaces together. Now cut along the edge of the label's printed area in the desired shape and trim away any excess.
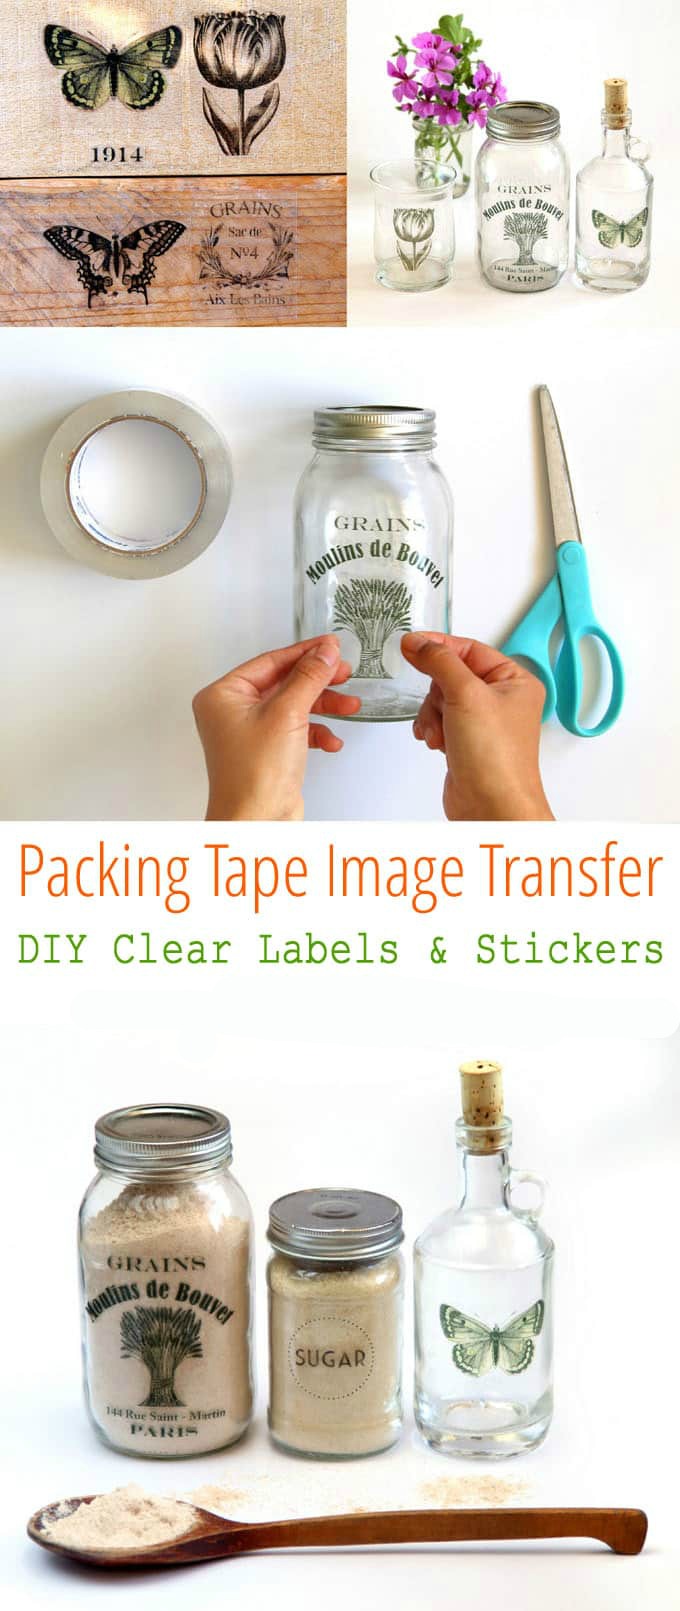
Image Transfer Using Packing Tape - DIY Clear Labels and Stickers
How to Make Your Own Clear Labels for Pantry Jars...from Packing Tape! I attached packing tape to the front of the labels, pressing down on the ink with a credit card to transfer the ink from the paper, to the tape. At this time, you can cut out the tape with the paper attached to the size you would like them to be. Then, I placed the tape with the paper attached in a bowl of warm water.
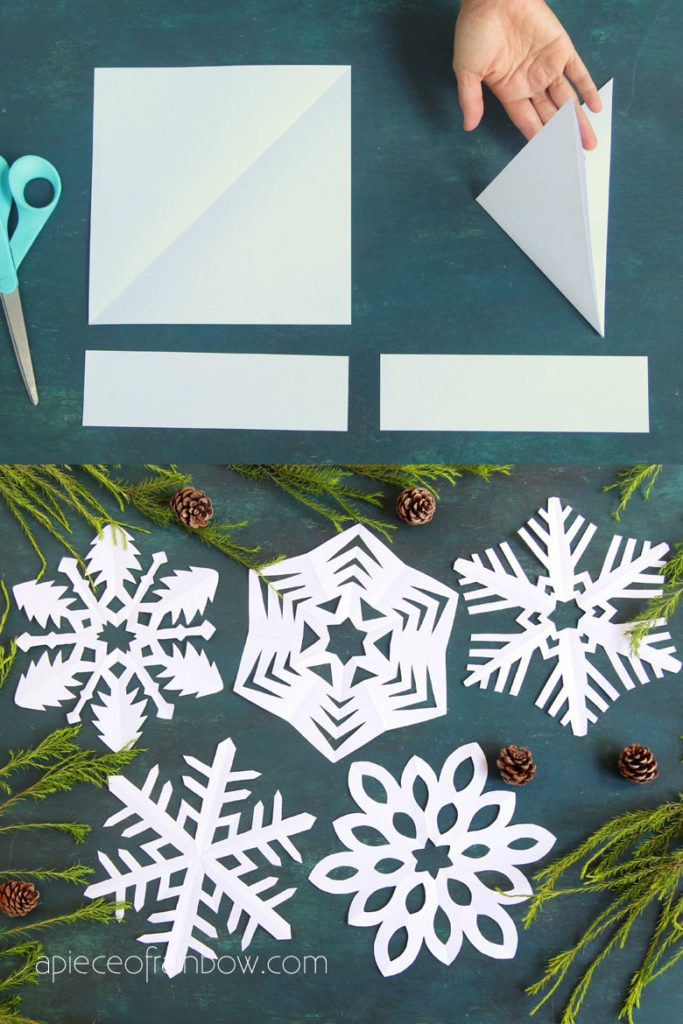
Make Paper Snowflakes (12 Best Free Templates!) – A Piece Of Rainbow
How to make your own clear labels | Blog | Sticker Mule Soak a paper towel in white vinegar and cover your label with this. Let the label soak the vinegar for about an hour before peeling it off. Baking soda and coconut oil: Mix equal parts of these two ingredients together. Cover the label with the paste created from the mixture. Let it sit for an hour or so then scrub the label away with a sponge.
Packing Tape Image Transfer & DIY Clear Labels - A Piece Of Rainbow
Make DIY Labels with PACKING TAPE / Clear Transparent Stickers - YouTube Make DIY Labels with PACKING TAPE / Clear Transparent Stickers This video is perfect for the super organized person who is looking to upcycle and organize t...
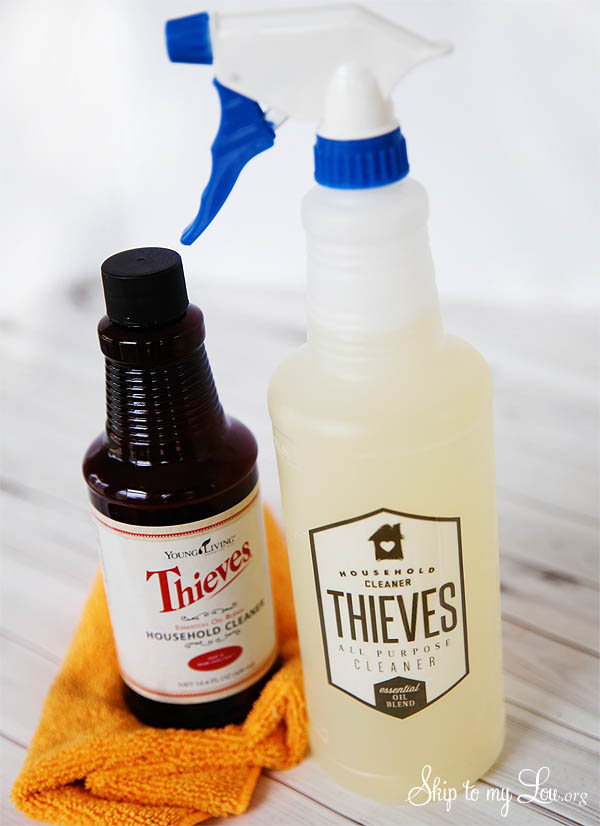
Thieves All Purpose Cleaner {printable labels} | Skip To My Lou
How to make DIY Jar Labels with the help of Paper and Packing Tape Once you are done with printing the DIY jar label, then cut the clear packing tape according to the size of jar label and press it on to the printed image. Now place the label in a bowl of warm water by keeping its glossy side down and paper facing up. Let it soak there for 2 minutes and then start rubbing the paper away using your fingers. Now ...

DIY Labels: How to Make Clear Labels with Packing Tape & Paper - Parent Vault: Educational ...
DIY How to Make Clear Packing Tape Labels - Liz Bushong Follow these easy steps to making labels with out a label maker. Create font and words on document and print on 8- 1/2″ x 11″ copy paper. Cut words apart with scissors. Words should be no larger than 2″ tall. The tape is 2″ wide so your words need to be anywhere from 1 to 1-1/2″ tall or size you need to fit your container. 3.

Craftily Ever After: Customized Water Bottle Labels
DIY Packing Tape Transfers! - The Graphics Fairy After you trim your image it is time to apply the packing tape …remember one important thing…whatever is white will be transparent. Just lie your image down and center the package tape over it evenly and press. Then cut the tape. Now it is time to burnish it…make sure to press heavily over the entire space it is very important.

Packing Tape Image Transfer & DIY Clear Labels | Jar crafts, Mason jar crafts, Packing tape
The Easy Way How to make Labels for Jars | Hometalk Take a regular packing tape (I used ultra clear) and place it over your word. Take a credit card and press hard to rub the into onto the tape. This is the most important step! Peel it off your table and cut off the access tape on the sides. Now drop it into a bowl of water. Let the label sit in the water for 1 minute to loosen the paper.
Post a Comment for "40 how to make clear labels with packing tape"